Friday, March 18, 2016

Small is beautiful, isn't it? Antec ISK 600M review

Today I'll try to share something with you about another case I had in my hands lately. As the title says - it was an Antec ISK 600M. It's a micro-ATX Cube case, measuring 290mm (H) x 272,6mm (W) x 340mm (D), comes in stylish black colour.


Exteriors

Antec decided to play safe when it comes to the front panel. It's made of plastic imitating brushed aluminum, and a mat bezel with front interface on it. There's also a place for slim optical drive.


ISK 600M front panel

The front interface is quite conventional. On the left side of it you will find one USB 3.0 port, audio and mic jacks and one USB 2.0 port. The blue USB 3.0 can be also connected as USB 2.0, as the cable has two type of connectors and attached instrucions saying to use only one of them. Sadly, USB 2.0 is on a separate cable, which means that with some motherboards (especially smaller ones) you won't be able to connect both of those USB front ports.

Left side of the front interface

Right side of the front interface is composed of Reset and Power buttons, hidden underneath pieces of flexible plastic, which has to be pushed in to use those switches. This construction prevents the user from pushing them accidentally, but I’m not sure about durability of those plastic plates. 

Right side of the front interface

A blue LED strip is hidden underneath the front panel bottom side, making surface under the case light up with aural effect. You will have to connect it to an external power though, using a molex plug. 

On the left side of the case you will find air vents for the front 140mm fan. Additionally you can observe the height the case stands from the surface and it’s standard feet. There’s also a cutout that allows a GPU better airflow.

Left side of the case

The right side of the case is very similar, but the airflow cutout is longer. Both panels and the top of the case are actually a one sheet of steel.

Right side of the case

On the back you can find pretty standard cutouts, although they tell you a bit about how the interiors of Antec ISK 600M are arranged. First of all, motherboard will be mounted horizontally, GPU and other expansion cards vertically. There’s room for a full ATX power supply on the floor, protected with dust filter made of fine mesh strapped on a plastic frame.

Back side of the case

There’s also some rubber grommets for custom liquid cooling solutions, additional air vents and one 120mm exhaust fan. As you can see, there are four back slot covers that can be reattached, that are hold in place with additional metal frame. It’s quite good system, allowing you to easily remove or put those covers back in place.

Back side of the case

Bottom side won’t surprise you too – there’s a dust filter for the PSU, some mounting cutouts and LED strip in the front. As you can see, front feet are removable, back ones are glued on. 

Bottom side of the case


Interiors

When you take the sheet of steel covering both sides and the top of this case, you will see two chambers of the Antec ISK 600M. Bottom one, a smaller one, will hold your PSU and up to three 3,5” drives in a bay. There’s a place for additional 80mm fan that will take the hot air from those drives and exhaust it on the back. There’s a lot of space for cables here, and you will be able to connect those drives easily. The PSU sits on a dampening foam strips.

Bottom chamber

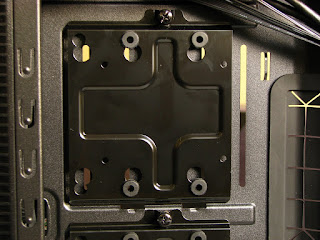
In the main chamber you will mount rest of your components. The case is compatible with Micro-ATX and Mini-ITX standard motherboards. You will be able to put a GPU as long as 312mm and a CPU cooler up to 175mm height. The top side of the case holds a bracket for up to four 2,5” drives and a slim optical drive.

Interiors

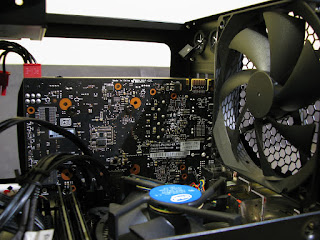
Left side of the interior has mounting holes for two additional 120mm fans, but mounting both of them means you won’t be able to use that top drives bracket. The front panel is easily detachable with plastic latches on both sides. The front fan is protected with loosely grilled metal plate of the front side, but there are some cutouts and space to run some of your cables to the top drive bracket.

Removed front panel

Both case fans have manual RPM controllers. I was able to put the exhaust fan controller outside of the case using those rubber grommets, but there is no way to get access to the front one from the outside of the case, which is a bummer.
Więcej wnętrza

Summary

Antec ISK 600M is a very interesting, mid-range case offering nice form-factor and a lot of space inside to mount some more powerful hardware. As far as main cons of this case come, it might be impossible to use both of those front USB ports at the same times with many smaller motherboards. The mounting system for additional side fans could be done smarter to allow use of the top drive bracket. Also, the front fan could be placed better. There are a lot of space under that front cover, but that fan is exactly on the same width as those air vents, and that won’t give you great airflow in there. Those fan RPM controllers are a bit weird too, it’d be better to include a simple fan controller on the front side of the case and connect both those fan to that. 


As for the pros, the build quality is really great for this price point – it’s very stable, doesn’t wobble and still quite light. Expanding options are great too. You can mount six fans overall in this case! I think that you could put a CPU AiO cooler in there, not only with 120mm rad, but a 240. slim one too. There’s also enough space in both compartments to run a custom loop in there, especially if you go with the smallest motherboards. It could use some more cable management tie points, because I found only two of those, and they weren’t very useful with the small board I used for this build. 


Personally, I would give Antec ISK 600M a solid 4+/5 score, especially thanks to the price of this case. It’s definitely a very nice case for someone who wants to go for smaller form factor, but still would like to have a lot of space for larger components and a lot of space to work with. Good job, Antec! :)

A rig built in Antec ISK 600M from the top view :)

Right side of it


And left side

The case used for this review was provided by a reader that I built this rig for :)

Friday, February 26, 2016

Why you shouldn't go cheap on PC case?

Today we will talk about PC cases. I sometimes scroll through some groups and messageboards, where people ask for help with making a parts list for their new rig. And there's a lot of "good guys" ready to "help out" dropping their lists like crazy. And I look at those and wonder if I should burn my eyesockets inside out, or just disconnect from the Web forever. "But why?" you ask? Well, about cases that are in those setups. It looks like Zalman Z3 Plus is just a perfect case for every rig out there. Don't get me wrong, Z3 Plus is a decent chasis. In it's price point. In line with the budget for a rig. But it's not a good choice for a 5 000 USD setup! And that kind of "advice" are all over Polish web, everyday! 

Zalman Z3 Plus [zalman.com]
I think that those "advisors" have their low-end rigs in those Zalman cases and that's the only case they know. Apart those before-2005 grey bricks. And there is nothing wrong with their rigs. Case is matching the rest of parts, they got something of better quality than before, so they recommend it. They are happy with it, after all, so why not to recommend it? In the same way, if someone drove a falling-apart, old car for most of their life, and now got a Smart, they will recommend a Smart to everyone. They like driving their new car, it has it's perks - so it has to be the best car ever, right? And here's the core of this issue, because when he gets into a real car ;) it will open his eyes. I think it's the same with computer cases.

Anyone still has one of these? ;) [overclock.net]

Therefore in situation I described here, we have parts for a lot of cash put into a 30$ case. Most expensive part will be a GPU, for sure. And the most surprising about it, is the fact it's the fastest part to age. But things that will age longer and you should invest your money in is usually ommited. Quite literally, becasue when you look at those part lists, you will see that the case is on the end. Usually there's 25-35 bucks left in the budget, so they slap that Z3 Plus or plastic Gladius M20 and post it, the faster the better, because there is bunch of "helpers" like that, who might post a part list with a GPU from a manufacturer I don't like! 

Corsair Graphite 760T Arctic White [corsair.com]

So why you should care and invest into better cases? I'll start with a point I have mentioned already - you will have to swap your GPU once per 2-3 years, to keep up with new games. CPU? Once per 5 years, maybe longer. Similar with the RAM. Storage drives? PSUs? You can use them as long as they don't show any sign of incoming failure. Especially PSUs - some come with 7 years warranty, for free. And today's post hero - a case. That's a piece of hardware that won't get used up, if it's decent quality. Worst case scenario - case fans will fail and you will have to swap them. But, truth to be told, first thing to do when you get a Z3 Plus, you will have to dish out 15-30 bucks to get some decent fans. Unless you want to piss off your family a bit with the noise. 

Corsair Carbide 900D [corsair.com]

I won't get deep into aesthetics - it's a matter of taste. Everyone will like something else. One thing is universal - the better quality of materials used, the better case will look like. And that's a fact. 

The easiest flaw of cheap cases is building comfort. I built rigs in Gladius M20, Z3 Plus. I've built some in Fractal Design Define R4 and Define S. I had some better SilentiumPC or Corsair cases in my hands. There is a lot of detail, which will make building a rig in a cheaper case a horror. Things like location of cable grommits, space behind motherboard tray, way of assembling some parts or cable management elements.


NZXT H440 [nzxt.com]

Other topic is build quality and durability. It's simple - some cases will bend when you put parts in them. A 100kg guy fell on my friend's Define R4. They glued the front panel back in place (hooks broke off) and... he got back to using his PC. Steel structure and thick steel sidepanels protected his rig just fine! 

Fractal Design Define R5 Black Window [fractal-design.com]

On top of all those points there are details that have impact on the overall work comfort with your PC - case stability, sound dampening, anti-vibration. You won't find those things in a cheaper case, and it's hard to appreciate it, if you haven't experienced it before. 

To sum this up - buying a better case is basically one of the best investments you can make when you buy a new rig. A good case will serve you for years to come. For example, it's better to rather take that 8GB of RAM instead of 16GB, but get a better case, instead of having to replace it in two years. And you can always get more RAM with the next paycheck! ;) Sure, that advice is not applicable if we're talking about low-end systems. There are limits of performance-per-dollar which you should not cross, especially for lower end systems. In those events you will have to save some money on a case for example. Just be considerate and keep a healthy performance-per-dollar balance :)

Saturday, February 20, 2016

How to make your old laptop work faster?

Do you have an old laptop lying around, but using it is just a pure nightmare? OS boots up long enough so you can grab a dinner? Everything works slowly and you can't just enjoy using your laptop? Usually it's not the fault of older and less powerful hardware. Sometimes it just takes a little upgrade to make it less painful to use it. I'll show you what I did with my Wife's laptop :)

I upgraded an old Lenovo Y550 (Intel T4200, GeForce GT 130M and 4GB of RAM). Apart from laptop :) you will need a few other things: an SSD drive (such as Crucial BX100 250GB), a drive caddy for second drive, some thermal  paste, thermopads, isopropanol, microfibre cloth or coffee filter, a can of compressed air, a screwdriver.

Main things needed to speed your laptop up :)

Step one - swapping your HDD for SSD. Difficulty: your five year old can do this. 


You will only need a screwdriver and an SSD for this step. We're going to do a really simple thing. Turn your laptop over, take out the battery and open up a small panel where the HDD is hidden. Usually it's somewhere on the edge, has it's own compartment. Now just move the drive to the side, disconnecting it and take it out, swap the drive in the bracket for your brand new SSD and put it back in the slot.

Thats how disconnected HDD looks like. Please, don't mind the rest of the hardware :P

Now just assemble it back. You will have to install a new OS on the drive - you can do that with a DVD drive if your laptop has one, or install from a USB stick. I'll install Windows 7 Pro x64 with a pendrive. It's good to have all the drivers somwhere around for the OS you want to install. You will find those on the manufacturer's website. You can just copy them to separate folder on a pendrive with OS installation on it and just use them after the installation.

SSDs are a lot faster than old platter HDDs, especially if you compare them to those lower end drives that are installed in laptops. You will notice a considerable shorter boot time and all of your apps will launch faster. Overall comfort of using your laptop will be higher.


And that's how a new SSD looks in laptop's drive bracket

Step two - putting the old drive back into the laptop. Difficulty: Your five year old will need a hand. 


Okay, we swapped the old and slow, but higher capacity (320, 500, 750 or even 1000GB) HDD for a faster, but smaller SSD. Currently the most cost effective are 250GB SSDs. So how do you get more space for your files? How to preserve the files from the old drive? We will put it back into the laptop, of course, but in other place ;). There is a DVD drive in a laptop which you can see on pictures in this post, but it stopped working a long time ago. We don't need it. So we will put our old HDD in that place. 

To do that you will need a laptop drive caddy, which you can get in some PC hardware stores. I got mine from online auction for just a few bucks ;) Small note - those caddies come in two thickness, depending on the DVD you have. Just be sure to measure it beforhand - it's either 12,7 or 9,5mm. Be sure to check the connections too - both the one that connects the drive to caddy, and caddy to laptop in place of the DVD. In most cases it should be a SATA - SATA interface, but it's better to avoid making a mistake :) In my case I needed a 12,7mm caddy. Put your old HDD in the caddy, make sure it's connected properly and you can screw it into place. 

Old HDD in a caddy

Now you will have to take the DVD out. Take the panel covering main compartment off (in some laptops you will have to find the panel closest to DVD) and find a single screw that holds the DVD bracket in place. Unscrew it and use your screwdriver to push the DVD out of the bay. Now take that small holding piece off the DVD and put it on your caddy, put caddy in the place of DVD and screw it. Usually you will get a masking frame for the caddy, so it won't look like your laptop got smashed ;D You can now format your old OS partition.

You've got two drives in your laptop now - fast SSD for your OS and apps and slower, but with more capacity HDD for other files. If you want to finish up on this step, it's a great time to clean the cooling fan. Grab a can of compressed air and dust off the fan. Just be sure to hold it in place so it won't spin around.

Step three - changing thermal paste. Difficulty: Find your five year old something else to do.


The next step usually needs you to completly disassemble your laptop. If you don't know how to do it, but are willing to learn - look for a disassembly video or a guide for your particular laptop model. Many laptops will be similar to disassemble, but there usually are some differences, that are good to know before you will want to throw your hardware out of the window.

When you finally get to the cooling system, you will have to unscrew it from motherboard. Take notice how the screws are numbered - it's the order you should screw them. Unscrew them in the same order or backwards. In case of laptops that are few years old, you will find some kind of fossil that was a thermal paste once.
Fossil on cooling system

Use a coffee filter or microfibre cloth and isopropanol to remove the old paste from CPU and GPU. Now do the same with copper plates on cooling system elements.

Next thing to do is swap old thermopads, which will help to move heat from the chipset and power delivery components of CPU and GPU. Look how they are arranged on cooling plates and compare that to elements on your motherboard. Use alcohol and fibre cloth/coffee filter to clean those elements. Cut out pieces of thermopad from a fresh strip (use scissors) and put them in place with tweezers. Now remove old pads from cooling plates, and clean those spots with alcohol. Last thing to do is to reapply thermal paste on CPU and GPU and put the whole cooling system back together :) It's a good time to dust off he cooling fan or radiators too.

Shiny! :D

Summary


After all those steps you not only sped  up OS booting, apps launching and you have more disk capacity in your laptop, but you also improved it's thermals and made it quieter by reapplying thermal paste and removing all the dust from cooling system. There is nothing else to do but brew yourself a cup of tea or coffe or open a beer and just enjoy your rejuvenated laptop :)

Nothing makes me more happy than clean and functioning electronics :)

Those are not the only things you can do to make your laptop feel like a brand new one. You could swap out or put more RAM sticks in there. I didn't do it, as this laptop has both of it's memory banks occupied, and it doesn't support more than 4GB anyway. This is even simplier to do than swapping the HDD to SSD, but be sure to check for compatibility and get the right RAM sticks. In many cases you can even swap the CPU. It is cost effective if your laptop has a lower end CPU from it's gen. You could increase it's efficiency or find a similar CPU that draws less power, so it will generate less heat. Every laptop is uniqe so if you're looking for a new CPU for it, make sure you know what motherboard and chipset you got and be mindful about cooling efficiency your laptop can provide. Lower end laptops usually have CPUs soldered to the motherboard and you will not be able to upgrade it.

It all comes down to cash you are willing to dish out for upgrading and what expectations towards your hardware you have. If you own an older high or mid end laptop, it will usually be more cost-effective to upgrade it rather than get a new lower end one.

Friday, February 12, 2016

Fractal Design Define S - Define series facelift?


This week I had inexpressible pleasure of building a rig in Fractal Design Define S case. By the pleasure I mean that I'm probably a Fractal Design fanboy. My rig sits in a Define R4 ;)


Exteriors


Entire case measures 233 x 465 x 533mm and you can fit up to ATX motherboard in there.

On the front you will find a well known Define series front panel with a blue LED cutout. Define S don't have any kind of door here though, like Define R has. There aren't any 5,25" drive bays on the front, but you can mount up to three 120/140mm intake fans or a radiator up to 360mm. The whole front is covered with a fine dust filter. In stock you will find one Fractal Design Dynamic GP14 140mm fan here. Side panels are very sturdy and thick, made of steel, with some sound dampening material. You won't find that on a panel with a window of course.


Dynamic GP14

Let's take a look on the front interface, located on the top side. It consists of two audio jacks, reset button, large power button with power/drive LED and two USB 3.0 black ports. You won't find two additional USB 2.0 ports or fan controller, which could be seen in Define R4/R5. Drive LED blinks with other tone of blue to indicate the system drive status. 

Front interface

Next, behind the front interface is ModuVent system, which is a set of three toolless panels with dampening material, easy to detach, that covers space for top fans and/or radiator. You will be able to fit up to three 120/140mm fans or one 180mm fan with a 165mm hole spacing. As for the radiators, you can slap a pretty big ones there - 420, 360, 280, 240, 140 or 120mm. For 420, 280 and 140mm rads the thickness clearance is 55mm for rad+fans. Unfortunately, when you take the ModuVent pieces off, there is a large unfiltered gap if you mount 120mm fans/rad. 

ModuVent system

Back of the case can only surprise you with a little in air ventilation depratment - less than in other Define chasis. It's rather standard looking otherwise - reattachable slot covers, space for a PSU isolated from the back of the case and it's floor with rubberized feet, another GP14 1400mm fan and steel, toolless screws for side panels, which are attached to it permanently, so you won't loose them that easily.

Back of the case

Let's look under the case. Here you will find well known Define series elements - ruberrized feet, long dust filter for both PSU and a floor mounted fan. There are some mounting points for custom loop elements too. You can mount a 120/140mm fan or 120mm rad here. There's also a handle to remove the front panel cover.

Underside

The side panel windows is colorless, very rigid and quite large to show all of your parts inside, including custom loop components. It reflects light very well too ;)

Side panel with window

Interiors


Inside Define S looks familiar at the first glance, but then you spot the lack of 5,25" bay brackects or 3,5" cages for that matter. But you will find a lot of space with mounting points for liquid cooling components, such as pump and reservoir. It's possible thanks to bigger MOBO backplate, that spans across the whole case now. 

Define S interiors

The MOBO backplate has a twist too, it's bent a little to make some additional space on the other side. It affected the size and place of some cable grommets. Frankly, the interior looks like it has been dismantled. Lets see the other side. 

Cable grommets

Here, Fractal engineers put some cool stuff. You can mount two SSDs behind the mobo tray, but check out that clever 3,5"/2,5" three mounting points on the left! Also - velcro straps for cable management are a good addition.

Magic happens behind the scene

Innovative 2,5"/3,5" mounting points

Summary


Define S, at the first glance, is very similar to it's more expensive brother - Define R5, or it's older brother - Define R4. But this chasis is a little bit different than those two, and you have to make sure to know them before you buy this case. For a regular PC user it's a stripped down and less expensive Define R5 counterpart. It lacks the fan controller, 5,25" drive bays, has less space for drives, underside dust filter is shorter and harder to access. But this chasis is a real treat for custom loop enthusiasts. There are a lot of additions that support liquid cooling in a standard ATX case for around 100 USD. You can easily mount two large rads, nice high reservoir with a pump and still have enough space for some HDD and SSD without making the chasis very big. 

Additionally you will find many well known Fractal solutions with their reliability and quality. The case is mostly made of steel, which makes it very sturdy and stable. Plastic elements don't creak or squeak and everything fits just perfectly.

As with Define series - building a rig in this chasis is just a pleasure and the effect is usually a great looking rig. This time I will put two ratings here: if you are planning on building a custom loop or throw some AiOs in there, then for this price this is clearly a 5/5. But if you plan to cool your parts with air, then lack of 5,25" bays or fan controller and only 2 front side USB ports might be an additional issue, But even taking that into account, this is still a solid 4+/5 case for me. 

That's how a regular rig looks like in Define S :)


The case used for this review was provided by a reader that I built this rig for :) 

Friday, February 5, 2016

Mouse from China - 1STPLAYER Fire Dancing Gaming Mouse review

Most of us, europeans, tend to think that Chinese produce only knockoffs of well known brands. What if I told you that they do have their own brands, that sell their own, original products? Feel free to check out this review if you're curious! 

Stylish 1STPLAYER Fire Dancing Gaming Mouse box

Specs and pricing


You can get this mouse on US Amazon store, although it will ship from China, for free. As I'm writing this review, it's on sale for 20 USD. 

Let's look at the specs that 1STPLAYER is claiming, as they look quite good for 20 USD:

- Mouse is symmetrcial, so no worries for lefties; 
- DPI up to 4000;
- It has Avago 3050 sensor nad Huano microswitches (only main buttons);
- Braided cable, 180cm (6ft) long; 
- 20G acceleration;
- Teflon feet;
- Polling rate - 1000Hz;
- Weights 119g (4.2 ounces);
- Wymiary 10,7 x 6,6 x 3.6 cm (4.7 x 2.6 x 1.4 inches);
- You can get it in white or black; 

The most interesting fact about those specs is that there's an Avago 3050 sensor, 4000 DPI and 1000Hz polling rate. I'll spoil a little - Avago 3050 has only 2000 hardware DPI, which means that anything above that is interpolated.

Package


The mouse is packed in a stylish, silver cardboard box. On the face of it you can find the name of the mouse and just barely visible 1STPLAYER spider logo. There is some technical data in chinese and english on the back of the box. 

Simple package
The mouse is not particularly secured in the box, but it's sized in a way that it won't bounce around in it. Under a small piece of cardboard you can find the braided cable, secured with a velcro strap. There's a small pamphlet containing a few technical details, information that it will work without dedicated drivers and that you can get the dedicated software on 1STPLAYER website.

Build quality and looks


Fire Dancing looks like a solid piece of hardware. There's no gaps to be found anywhere, it doesn't crunch or creak and the plastic material used looks durable. Sadly, 1STPLAYER decided to use very smooth, reflective and rigid plastic on the top surface. As a result, mouse reflects light so much, that you can see my camera's reflection in some of my photos :) Side panels of the mouse are also made with a rigid plastic, but those are matt. On the top of the mouse you can find two main buttons with microswitches, backlit (from the sides) scroll with a button, a switch for DPI/lightning settings and backlit 1STPLAYER logo. 

Fire Dancing out of the box
As I have already mentioned, the profile of this mouse is symmetrical. Interestingly, you can find an identical, long side button on both sides of it. Cable braiding is very rigid and black/white. It is, by far, the least solid looking part of this mouse, but that stiffness saved the cable from folding too much in the box. 
The underside
On the underside you will find the manufacturer's logo, model name, serial number and a few additional information in chinese that I can't read. There's also a quality sticker and four large teflon feet. The feet seems stiff, hard and quite smooth. 

The lightning
After you connect the mouse to USB port in your PC, the mouse will install instantly and will light up in red. If you won't move it for a bit the light will fade out and come back slowly. Color corresponds with DPI settings, but you won't found any color-coding key in the pamphlet or underside of the mouse. By default, it has four different DPI settings, which are color-coded from the lowest to the highest DPI, in order: Red, Blue, Green, Purple. All those colors are very vivid and shows the 1STPLAYER logo perfectly. 

Software


I found and downloaded the dedicated software from the manufacturer's website and it installed just fine. Unfortunately it doesn't detect the mouse, showing a simple Windows error prompt. Any attempts at opening the software, accessing it's settings fails. 1STPLAYER employee told me that the driver lacks some files and he will send me a working version via e-mail. Sadly, he had some issues with sending that 3mb file and I didn't get the driver to work. At the time of writing this review I couldn't use the dedicated software for this mouse. If I ever manage to make it work, I'll post an update here.

Tests


I decided to run some standard mouse tests, to verify some of the mouse specs claimed by 1STPLAYER and to assess the actual capabilities of this hardware. Windows mouse acceleration was disabled during those tests.

I've started with checking the data sending rate from the mouse to a PC. I remind you that manufacturer claims 1000Hz, so we should get a 1ms delay. 

Mouse Rate Checker test
As you can see on the image from Mouse Rate Checker above, Fire Dancing only achieves scores around 500Hz. Scores around 450 and 550Hz are errors due to this method's imperfection. So we've got a 2ms delay. It's a quite good score for a mouse at this price point, but 1STPLAYER claimed the 1000Hz polling rate. I'll be honest on that - my knowledge about this topic is rather basic, but I belive that the manufacturer doesn't tell us the whole truth in this case - sensor is actually sending data at 1000Hz rate, but it sends it to a microcontroller built in the mouse, and then it sends it to a PC with a 500Hz rate. I know that A4Tech had something like that going on with some of their products. If you have any kind of additional insight into this matter - please, share it with me in the comments section :) 

Next thing to test out was interpolation - Avago 3050 sensor has hardware sensitivity capped at 2000 DPI, so that means there has to be some kind of interpolation to get up to 4000 DPI with this mouse. 

Vmouse Benchmark interpolation test results

As 1STPLAYER isn't stating the DPI for each setting, I used the colors that corresponds with each of them. Testing with Vmouse Benchmark shows, that the two highest settings are clearly using interpolation - you can see this as those gaps in 1px wide lines I slowly drew. With higher DPI settings, Fire Dancing just looses pixels. 

Następnie przeszedłem do pomiaru DPI, także z użyciem Vmouse Benchmark. Pomiar jest mocno orientacyjny, ze względu na to, że wymaga bardzo precyzyjnego ruchu myszką na odległość ćwierć cala. Umieściłem suwmiarkę w najszerszym miejscu myszki, wyzerowałem, po czym ustawiłem ćwierć cala i przesuwałem myszkę między ramionami suwmiarki. 


DPI measurements - DPI is bolded

As you can see, the mouse gets up to 5000 DPI. If I performed the test well enough, then Fire Dancing ha some heavy interpolation going on.

Another property we can check is looking for acceleration. The easiest way to test it is to lanuch a FPS game. I chose Far Cry 3, and disabled the in-game mouse acceleration. To run the test: point the gun as low as you can, shoot once to mark the spot. Then move the mouse slowly in straight vertical line to make a full 360* turn. When you get back to the starting point (bullet mark), move the mouse back to the exactly same point on your mousepad, but this time do it fast. 

Acceleration test in Far Cry 3
As you can see, Fire Dancing has some light acceleration, as we didn't move back to the same spot, but the manufacturer stated that in data sheet. Results are quite solid for low DPI settings. The higher the DPI goes, results get worse. 

Last, easy to run, but hard to interpret, test is jittering test. Basicaly, jittering is an effect that makes your cursor to not move in straight line, even if your mouse goes perfectly in straight line. It looks like a jumpy cursor, going all over the place. The easiest way to test this, is to show your graphic editing software l33t skillz in MS Paint ;) I did this test on all DPI settings.


With higher DPI you can see some jagging in the lines - zigzags, when you try to draw a smooth line. The effect is small, but you can see it with Fire Dancing. 

Performance and experiences


As I started to use and game with Fire Dancing, I had some issues with adjusting. I've been using mice with a very particular profile for a few years now, so it took me a while to get used to this one. In this adjustment period I found out that my concerns confirmed - smooth, reflective material used on the top and the one on the sides isn't helping with control at all, and you can see all kinds of finger marks on it after just few minutes of using it. 

The surface hasn't scratched yet, but I got this mouse just couple of days ago. I fear that scratched, smooth reflective surface won't look very appealing. On top of that, the hard plastic made my palms hurt during the first few hours I was gaming with Fire Dancing. Two days later it stopped to give me that discomfort, but I didn't had that kind of issues with mice coated with softer plastic or rubber. 


I really like the main buttons. For this prie point, they are very pleasant to use, travel distnace is very low, and I like the sensitivity - I didn't have any issues with random clicking or not getting response from those buttons. 

Scroll looks solid too - it's smooth but you can feel the scroll distance clearly. The button built in it is comfortable to use, profiled nicely. I did have some random scrolling, but as I get adjusted to the mouse it stopped. 

Side buttons are another story entirely. There are two of them one on the left and other on the right side. The size and shape of those buttons are on the plus size for sure - they're wide and really long so you shouldn't have any issues with reaching them. Even I don't have trouble reaching them with my short fingers ;) The issue I had though is that they have really low key travel distance and low actuation force, so it's easy to just push them randomly. On top of that, when you browse the Interwebz, you usually can use two side buttons as Back & Forward keys. The one in the front is usually a Forward button, and the one close to the back is Back. In Fire Dancing the left button is Forward and the right one - Back. It makes it hard to use it at first, as it's counter-intuitive. 

Teflon feet in Fire Dancing seems to have a lot of friction on my QcK mat, but that's because of the mat itself and large feet size on the 1STPLAYER mouse. They are decent on wooden table. 

Summary

1STPLAYER Fire Dancing Gaming Mouse is a piece of hardware, that falls into low-mid end category, and should be rated as such. 

Pros:
+ Durability of used materials and the final product; 
+ Vivid lightining colors; 
+ It has side buttons on both sides for righ and lefthanded gamers; 
+ Quite good parameters-to-price ratio; 
+ Solid main buttons and scroll;
+ It's a new and not that well known brand in europe, which might be an advantage for someone who likes uniqe hardware; 

Cons:
- Side buttons are too easy to push randomly; 
- Can't run the dedicated sotware, no access to additional options (such as lightning and DPI settings); 
- Smooth, hard and reflective surface on the top; 

Due to some understatements in specs of the mouse (polling rate, DPI), not working software and not-so-comfortable sie buttons, I can give this mouse score of 3+/5. If I can make the software to work and it has all the options gamers are used to have, I could easily see this as 4/5, but for now, I can't rate it higher. 

You also should pay attention to the pricing of this mouse. Especially if you don't earn your money in USD/GBP/EUR. I wouldn't pay more than 20 bucks for this mouse, including shipping (which is currently free - big kudos to 1STPLAYER for that!). If the mouse goes for 30 USD, you should look at other offers. 

Mouse used in this review was bought during sale AND with a discount code from 1STPLAYER.